 |
| An African-style dress, a matching headwrap, and black sandals for Dasia to be worn by Maya |
The
African-style dress above, made by Vanessa of Fashion Dolls at Van's Doll Treasures, inspired me to create a better-quality face for my
Dasia as Maya doll. This task had been on my to-do list since the original face was made in September 2014.
Recall the process (from
the original post) in which I printed a headshot image of Maya Angelou onto light T-shirt transfer paper. My printer ink was low at that time. As a result, the original face was not as vibrant as it could have been, which is the reason I wanted to create another. In the original process, the printed face was ironed onto white T-shirt material and glued onto a mold of the doll's face made using T-shirt material and Aleene's Tacky glue. In one of the comments on the original post,
Phyllis suggested dark T-shirt transfer paper might have worked better.
 |
| This photo illustrates the tacky-glue face mold as it cures (not the mold ultimately used for the new face, however). A printout of the new face is shown along with the package of dark T-shirt transfer material, which was used to transfer the new face. |
 |
| In this picture, A printout of the new face onto dark transfer material has been ironed onto a piece of white T-shirt fabric. Because of the yellow-brown areas on the right that resulted from a too-hot iron for this blend of T-shirt material, I reprinted and re-transferred the new image using a cooler iron. |
As described in the caption above, for the new face, dark T-shirt transfer paper was used. I modified the original face-mold-making process by using a thin layer of polymer clay (instead of glue-hardened fabric) to make the mold.
While making the new face, I discovered the image transfer process for dark T-shirt transfer paper differs from image transfers onto light T-shirt transfer paper. After printing the image onto the transfer paper (which has a rubbery texture), the backing was removed and replaced behind the transfer image for support while the desired image area was cut out. The cutout was placed
face up onto the T-shirt fabric, and a piece of parchment paper was placed on top. An iron, on the correct setting for the fabric, was used to complete the transfer by ironing over the parchment paper-covered image. (It's difficult to explain, but hopefully, this is clear.)
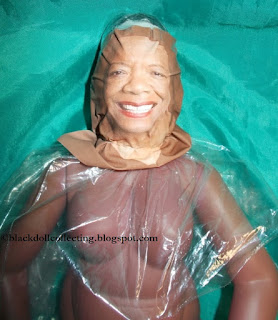 |
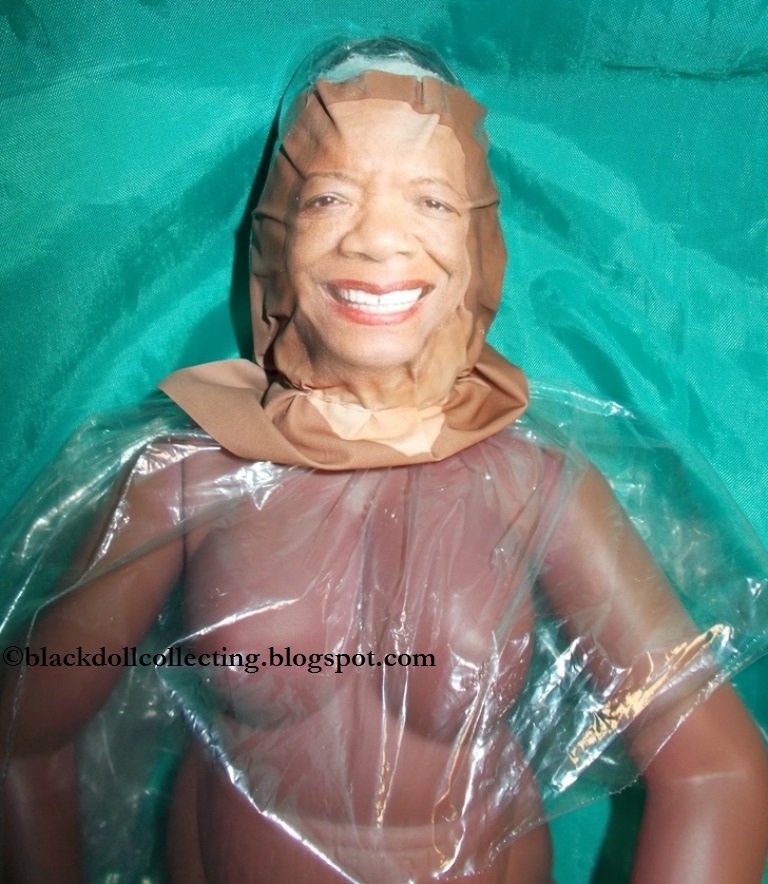
| In this image, the new transfer paper face has been glued to the polymer mask, which is placed over the doll's original plastic-wrapped face. (I wrapped the doll's face in plastic to protect it from the polymer clay as it dried.) |
 |
| An additional piece of plastic was wrapped around the new face/mask to smooth out any wrinkles. |
In the above two images, the new face has been transferred onto transfer paper, which has been glued to the polymer clay mask face. To ensure the mask maintained the desired shape, it was placed over the doll's plastic-covered face, and another piece of plastic was wrapped tightly around the new face until the glue hardened. This was done because the glue used to attach the new face to the clay mold softened the clay.
I did not take step-by-step photos of the entire process, but the end result follows the next image of the faded first mask face.
 |
Maya's first face was made with light T-Shirt transfer paper. The facial colors were not as bright as desired.
|
 |
| This is a close-up of a new, more vividly colored face. |
 |
| The new face and the new fashion (the face scale is a bit off, but the color is on point). |
Thanks again, Vanessa, for the inspiration to complete the project. Thank you, Phyllis, for suggesting the dark T-shirt transfer paper. Maya is a happier doll as a result.
dbg


Nice job Debbie! Maya looks fabulous. I love her new look.
ReplyDeleteThank you, Roxanne!
Deletedbg
Great job Debbie!! Maya turned out nice.
ReplyDeleteThank you, GG!
Deletedbg
Wow, I am so happy using the transfer for dark T-shirts worked out for this process! It does give the face a more vibrant look. Great job!
ReplyDeleteSo am I, Phyllis; so am I. Thank you again for the excellent suggestion to try the dark T-shirt transfer paper.
Deletedbg
Hi Debbie! Maya looks gooooooood! The use of dark T-shirt transfert paper worked wonders. Of course you played your part.
ReplyDeleteBRAVO!
:-)
DeleteThank you Arlette! It was a work in process for about a week and a half+ due to interruptions from my health and the health of another, but I finished, finally!
dbg
You might just inspire a company to make Maya in the mass market! Wouldn't that be great!
ReplyDeleteThat would be great (with her family's blessings of course).
Deletedbg
That is so cool. She came out good. The outfit is lovely.
ReplyDeleteThank you Janainah!
Deletedbg
Very impressive! Your creativity is always so inspiring. Maya looks great.
ReplyDeleteThanks, Vanessa! The new fashion gave me the push I needed to get this project completed.
Deletedbg
This is just so amazing!
ReplyDeleteThanks, Muff. The new face would work probably work better on a flat surface or without an actual face underneath, but I wanted it to be removable in the event that I want to use Dasia as Dasia (even though I have two more). I love her too much to permanently change even one of the dolls' faces.
Deletedbg
This is brilliant! I've never seen a doll given a new face this way before, but it really worked out nicely. Impressive work!
ReplyDeleteThank you, jSarie!
Delete:-)
dbg
Wow, it looks pretty good. I would not have imagined it would look so good based on how it was unfolding wiht those few process pictures. Great job!
ReplyDeleteThank you, Nikia. She is one of the first dolls I see when I enter the doll room and I smile each time I see her face, which did turn out a lot better than expected.
ReplyDeletedbg