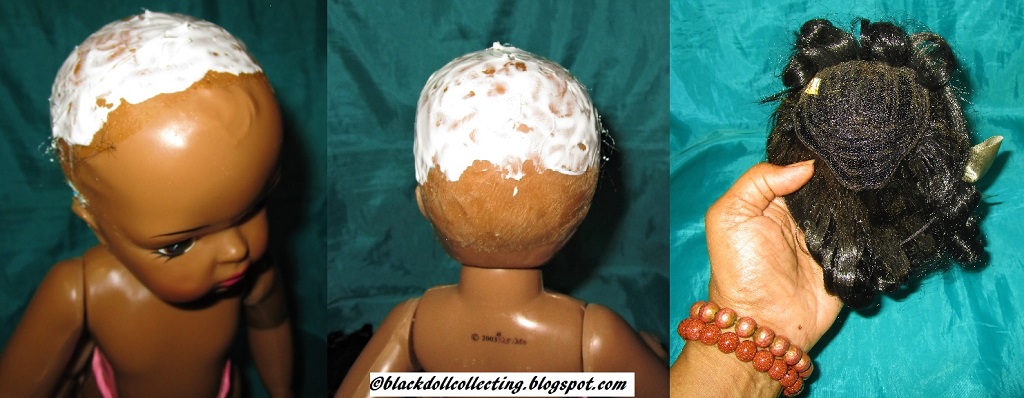
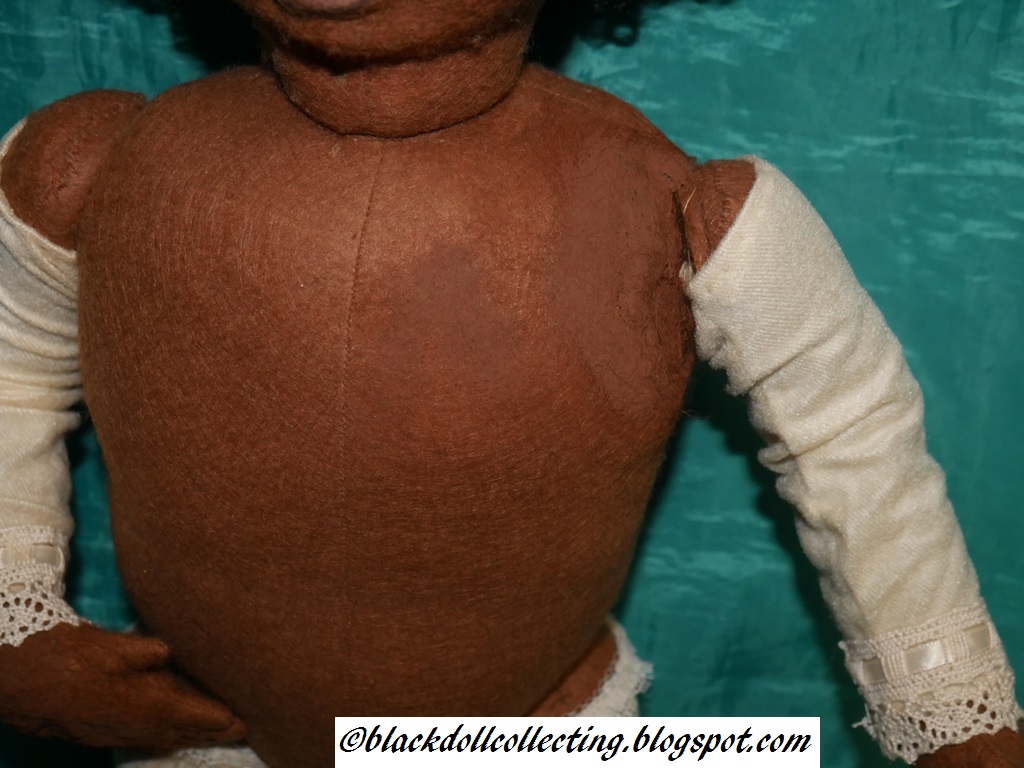
Showing posts with label doll repair. Show all posts

Tuesday, August 5, 2025

A Topsy Doll from the UK

An 11-inch Topsy from Enfield, England, needed repairs.


An 11-inch circa 1930s Topsy arrived from Enfield, England on 07/22/2025 in need of repair. It was offered to me by the daughter of the original owner. It has been her mother's childhood doll. The daughter believes her mother made the doll's dress.

I retrieved the package on 07/28/2025 and began working on the doll the next day. Using her original hand-knit dress, after thoroughly sanitizing and hand-washing it, I gave it "Patrick Kelly" embellishments using buttons from a button tin that my mother gave me several years ago. All necessary doll repairs were completed by 08/01/2025: retouching and sealing missing paint from the head, extremities, eyes, mouth, and teeth, and restringing. Topsy is now incorporated into my collection with similar dolls. The details of the repair are captured in the following video (posted previously on Instagram and Facebook). 


Navigate here if the reel does not load immediately. 

Three US-sold (and/or made) Topsy dolls pose with the repaired UK Topsy.


Many antique and vintage black dolls made in England and other parts of Europe often had ebony complexions similar to the repaired doll. They obviously sold well there. The repaired doll is my first composition Topsy of this size and complexion, known to be made or sold in the United Kingdom. Most composition Topsy dolls sold in the United States during the same time (1920s-1930s) had light to medium brown skin tones, as illustrated in the group photo above. Except for early 1900s stereotypical dolls sold in the US, merchants must have felt that lighter-complexioned black dolls would sell better here than deeper-complexioned dolls. 


Related Links
Topsy Dolls Found in Early Sears Catalogs

__________

All photos and text are copyrighted and cannot be used elsewhere unless permission is granted by the author.

©Black Doll Collecting/dbg

There are countless items to collect and write about. Black dolls chose me.

__________

Thank you for reading. Comments that are not spam are appreciated. Spam comments will not be published, so don't waste your time. To contact me directly regarding dolls or any of my posts, please use the contact form on the right of the home page, which is visible in "web view." A link to web viewing should be visible at the bottom of this page.

If you're not already a subscriber, visit, "like" and follow the Black Doll Collecting Facebook page or bookmark the Black Doll Collecting home page and visit on Tuesdays and Thursdays when typically new posts are published.

Check out what I am selling here
Check out my eBay listings here.
Please follow my sister blog Ebony-Essence of Dolls in Black.
*New*Visit/Follow DeeBeeGee's Virtual Black Doll Museum
Donate here to support this blog. Thank you!

Tuesday, September 13, 2022

How Dusting Led to Doll Repairs

Sunday Best Benji and Bonnie Lou by Terri Lee are 2003 reproductions of the original 1940s-1950s dolls.


After removing dolls to dust and to dust their display area, I discovered unsightly head seam separations of Sunday Best Benji and Bonnie Lou. Their clothing removal led to another shocking discovery. The seams on the sides of their bodies were separated, too. Their clothing had been holding the dolls together.

Their clothing had been holding their bodies together.

After removing their clothes and purchasing E6000, an epoxy glue, I removed their wigs and took the dolls to my husband to repair.

E6000 repair attempt

The E6000 was not strong enough to hold the head seams together.

The E6000 was not strong enough to hold their hard plastic heads and bodies together. "It peeled off like rubber," according to my husband. We both conducted separate online research, and interestingly, we found several different glues by JB Weld designed for gluing auto parts. 

A glue designed for cars worked well to hold together the separated seams.

From AutoZone, I purchased JB Weld Plastic Bonder high strength structural adhesive designed to glue emblems to automobiles. It is a two-part tan solution that comes in two connected syringes. It includes a mixing tray and a wooden stick for mixing. 

JB Weld was applied to all separated seams and allowed to dry...

...for more than a day to make sure the seams would not separate.


After applying the glue to the separated seams, my husband used rubber bands and masking tape to hold the parts together while the glue dried. 

Glue-filled and painted seam gaps below the ears are illustrated here.

This is another view of the gap-filled and painted seams.


After the JB Weld hardened, there were gaps in some areas of the head seams. I added more glue to fill in the gaps and after the additional glue dried, I painted over the glue to match the doll's complexion (not realizing that their wigs would cover these areas, but still... I knew the gaps were there and I wanted to fill them in.)

Rewigging

After the JB Weld glue dried, I applied Aleene's Tacky Glue on the dolls' heads for wig replacement. 


Aleene's Tacky Glue covers Benji's head.


Over the glue, the slightly inverted wig was placed on Benji's head, matching the widow's peak of the wig with the widow's peak area left by the original glue that stained Benji's head.

The same process was followed to replace Bonnie Lou's wig, but the glue was only placed on the crown of Bonnie Lou's head as it had been done originally.

Bonnie Lou's wig replacement

Both wigs are in place.


A scarf was tied over their heads and faces to keep the wigs snugly in place until the glue dried overnight.

Next, the masking tape and rubber bands were removed before redressing and placing the dolls back on display. 

Benji and Bonnie Lou are redressed but Benji is without his hat in this photo.


Sunday Best Benji and Bonnie Lou are once again whole.

Several other collectors have experienced the same seam separation issue with the reproduction hard plastic Terri Lee dolls. I believe the issue stems from the imprecise construction of the dolls' parts. The head sits poorly (too low) on the neck. The neck stringing causes pressure on the parts (pulling the head down onto the neck) and the seams eventually separate. The strength of the original glue also weakened with time and caused the front and back of the body to separate. No one knew this would happen until it did... to several of our dolls, unfortunately. 
 

©Black Doll Collecting/dbg

There are countless items to collect and write about. Black dolls chose me.

__________

Thank you for reading. Comments that are not spam are appreciated. Spam comments will not be published, so don't waste your time. To contact me directly regarding dolls or any of my posts, please use the contact form on the right of the home page, which is visible in "web view." A link to web viewing should be visible at the bottom of this page.

If you're not already a subscriber, visit, "like" and follow the Black Doll Collecting Facebook page or bookmark the Black Doll Collecting home page and visit on Tuesdays and Thursdays when typically new posts are published.

Check out what I am selling here
Check out my eBay listings here.
Please follow my sister blog Ebony-Essence of Dolls in Black.
*New*Visit/Follow DeeBeeGee's Virtual Black Doll Museum
Donate here to support this blog. Thank you!

Wednesday, October 2, 2019

Two More Composition Doll Repairs


The crazed head of the Topsy doll seated to the right of the doll in the rust-colored romper was recently repaired.   This photo was taken before the repair.
After repairing the 9-inch Topsy, shown above in the rust-colored romper and introducing her to other circa 1930s composition Topsy dolls that are displayed in a doll baby bed, I noticed a couple of other dolls that needed my attention.

A crazed head (lifted composition) was one doll's issue.  Another doll had been poorly repaired by a previous owner.  Crazed areas had not been filled in on the second doll; these and other areas on the doll's hands, body, and legs had been painted a brown color that did not match the original brown paint.  Additionally, this doll was not an authentic Topsy.

I did not take pictures immediately before the repairs of either doll because this post about their repairs was not planned.  I was able to find some vintage before photos of the dolls to share.

The First Doll Patient
These vintage photos illustrate some of the head crazing this doll had prior to its recent repair.
The 9-inch Topsy in the peach gingham dress arrived in the late 1990s to early-2000s with some head crazing and minor crazing on the sides of the face.  The head crazing had progressed as shown in the first photo of this post where the head looked like a case of vitiligo.

The crazed areas were almost crater-like.  These were filled in using several layers of Mod Podge until the areas were even with the original surface of the head.  After the Mod Podge dried completely, I painted the hair area black.  The lightly crazed areas of the face were filled in and painted with a mixture of acrylic brown paints that match the doll's original complexion.  I repainted the eyes and sealed the dried paint with satin finish liquid varnish that was applied with wedge make-up sponges.  Most of the painting was done with the sponge wedges, too. Paint brushes or toothpicks were used for detailed painting of small areas.  As a final touch, I gave her new ribbons for her hair.

Below are several after photos of this little girl now.


The different angles of her head illustrate the repaired and painted head crazing.

Full-view and fresh look post repair.
The Second Doll Patient

12-1/2-inch fake Topsy wears the same white see-through dress that she arrived wearing over a decade ago.  A crazed area on her chin and other areas throughout her body had been painted over by a previous owner using a lighter color brown than that used for the rest of her face and body.

This doll had been made into a Topsy by a former owner who took the liberty to shoddily drill three large holes into the doll's head and add a few pieces of embroidery thread into each.  While performing the minor fill-ins of this doll's crazed areas (mostly on the head) and repainting the entire doll an even color, I decided to remove the embroidery thread from the head and fill in the holes with air-dry clay to restore her to her original molded/painted hairstyle.  After painting, satin finish liquid varnish sealed the paint.  Photos of how she looks now are shared below.

There are no more holes in this baby's head and those tacky ponytails are gone, gone gone!

The chin area is now a more even color.
I used a men's crew sock to make a pair of undies for the baby to prevent most of her body from showing through the dress.

New undies made from a crew sock

I think she looks much better without the Topsy braids and her now even coloring also adds to her appeal.

"I'm all better now."

Back to Bed
The baby in the peach gingham dress readily went back to her place in the baby bed.
The second doll reluctantly went back.  She chose to stand instead of sit as she was doing before (facing in the opposite direction) in the first photo of this post.  I will have to watch her closely because I think she still "wants out."

dbg


There are countless items to collect and write about. Black dolls chose me.
__________

Thank you for following, commenting, and sharing using the share button below.

Check out what I am selling here
Check out my eBay listings here.
Please follow my sister blog Ebony-Essence of Dolls in Black.
Donate here to support this blog. Thank you!

Monday, January 14, 2019

Ruby's Repair

Ruby Bridges by Karen Oyekanmi

My Ruby Bridges tribute doll, first seen here, had a mishap.  The day after she arrived, when positioning her for display, I noticed her left arm was not in the arm socket; it was hanging inside the sleeve of her dress.  The cement used to hold the arm hook that was attached to the inner string had weakened.  I consulted the artist who offered to repair Ruby for me, but that would have involved mailing the doll to her.   I knew between my husband and me, we should be able to repair her.

In the past, we had used QuikSteel to repair two other porcelain dolls.  So, I knew it should be a simple task of repairing Ruby's arm.  My only problem was that I am inexperienced at stringing.

Ruby's stringing was pulled outside her body and held in that position with a rod fashioned from a jumbo paperclip.

After Ruby was undressed down to her undies, socks, and shoes, using a pair of hemostats my husband was able to pull the existing stringing out of the body through the body armhole.  I quickly created a rod by opening up a jumbo paperclip which was slid underneath the knot in the stringing to hold the string outside the body until the rest of the repair was completed.  Minus the hemostat pulling, that process is illustrated in the photo immediately above.

I went to a local auto supply shop and purchased what I thought was the correct QuikSteel formulation.  Unfortunately, it was a liquid form and not the epoxy putty that I needed.  We went to Walmart to try to find it, but they were sold out.  So I ordered it from Amazon.

I decided I would do this repair from this point on by myself.  After getting the necessary reassurance from the artist that my plan would work and after making one modification at her suggestion, the repair began.

What Was Done

The hook has been set in QuikSteel as described in the next paragraph.

Inside the hole in the arm, I stuffed a few strips of newspaper to fill up some of the space in the cavity.  I inserted and centered the closed end of the hook and packed the QuikSteel putty firmly around the hook, making sure to keep the hook in the center of the armhole.  QuikSteel cures quickly but was allowed to dry fully for 24 hours.

Photo taken from a different angle illustrates the hook, which is set in place using QuikSteel epoxy putty.

The next day, the hook was firmly set inside the QuikSteel as shown above.


The hook was next attached to the stringing.

The open end or exposed end of the hook was attached to the knot of the string at the armhole as illustrated above and from one additional angle next.

Different angle of the hook attached to the stringing

Using the paperclip rod to lift the stringing away from the body, the long ends of the stringing were stuffed back inside the body.

A perfect repair
Next, the paperclip rod was removed and the arm positioned itself into the armhole perfectly as shown above.

She's all better now.
After the repair, Ruby was redressed.  The hang tag that bears a headshot of young Ruby Bridges was placed back on the left wrist.  She recovered nicely.

I shared the process and completed photos with the artist who wrote:
YOU DID A FANTASTIC JOB
Thank you for the pictures, she looks so happy!
Very sorry you had to go through that...... but you do have the giftπŸ‘Œ

I smiled.  I think Ruby did, too.  
:-) 

dbg
__________

Thank you for following, commenting, and sharing using the share button below.

Check out what I am selling on this blog here
Check out my eBay listings here.
Please follow my sister blog Ebony-Essence of Dolls in Black.
Donate here to support this blog. Thank you!

Wednesday, July 18, 2018

Saving Keziah 1860

Keziah 1860, a 23-inch felt doll by Carolyn Seybert

Purchased in April 2007, a year before I began Excel spreadsheet documentation of doll purchases, I introduced Keziah to my Yahoo! doll group with the above photographs and the following text:

Meet Keziah by Carolyn Seybert of San Antonia, Texas. Made of felt with hand-painted eyes in 1987, John 7:37-38 is written on her back below the artist's signature and other identifying marks.
Keziah's handwritten back markings are shown above and described in the next caption.

Representing a girl of 1860*, named after one of Job's daughters**, her name, the year made, the artist's signature, 3/10 (which means she is #3 of an edition of 10 dolls), and John 7:37-38 are written on her back.

John 7:37-38 King James Version reads:
37 In the last day, that great day of the feast, Jesus stood and cried, saying, If any man thirst, let him come unto me, and drink.
38 He that believeth on me, as the scripture hath said, out of his belly shall flow rivers of living water.

*If the artist's intention was for Keziah to represent a child of the 1860s residing in the American South, she would have been born into slavery and still a slave in 1860, the year before the American Civil War was fought between the North and South over their different views regarding slavery, and three years before the Emancipation Proclamation was signed by Abraham Lincoln on January 1, 1863.  However, if she was a Texas slave, she would spend an extra two and a half years enslaved post-Lincoln's signed proclamation because the abolishment of American slavery was not announced in Texas until June 1865.

**In the Bible, Keziah was the second of the three daughters born to Job after his sufferings.


Keziah's hang tag describes her clothing and contains the artist's 1987 address and telephone number.
In my collection, Keziah is a free doll.  I recall after winning the eBay auction attempting to reach out to the artist by phone and by snail mail.  I wanted to gain more information about the doll (what was her inspiration for creating Keziah; what inspired her to name her Keziah?, are just two questions I would have asked).  My attempts were futile.  I would later learn, however, that Keziah has a brother.  A fellow collector owns the boy but she, too, has no more information about the artist than I.

Keziah has been displayed in the doll room, standing unsupported near the mini-blind-covered patio door.  Did the weight of her free-standing body or sun exposure cause what I recently discovered about her?

When I saw the circled areas, first on her right wrist, I thought this was sunlight beaming through the mini blinds.  Upon closer inspection, I discovered what was happening to her.
Approximately three months ago, several areas of Keziah's felt were discovered to be deteriorating.  These areas were worn so thin that the stuffing was visible.  These were in areas of stress such as her wrists where they bend and her ankles from bearing her weight.  I would soon learn that the felt at other areas was worn thin as well.

In addition to stressed areas at the wrists and ankles, areas of Keziah's back and joints were also worn thin.
This was a very disheartening discovery.   I wanted to do something to restore this special-to-me doll that had been part of my collection for 11 years and in the doll world for 31.   I contacted felt doll artist, Karen Oyekanmi, who has made two dolls for me in the past (my Toddler Baby and Kellie).  Karen graciously offered to do the repair.  So, Keziah was shipped nude to her.  Needle felting the weakened areas was done, but Karen discovered this only caused breakdown of the surrounding areas of original felt.  Because the arms and legs were the most affected and vulnerable areas, I asked Karen to make arm cuffs and leggings for Keziah to match the color of her off-white/cream-colored apron.  This was successfully done before the doll was returned to me.

Keziah now has arm cuffs and leggings to protect the original felt in these areas.  Her needle-felted right wrist and left upper chest near the shoulder were painted over after she returned home.  Because I noticed breakdown at the soles of both feet, I stabilized these areas too.
Upon the doll's return, the deterioration of several exposed areas continued.  With even the slightest touch or turn of a limb, the felt continued to break down.  Because I did not like the appearance of the needle felted areas (which looked hairy to me), I decided to paint over these and other weakened areas as illustrated in the next several photos.

Close-up of painted-over needle-felted upper left chest
Karen had needle felted most of the left side of Keziah's back, which I painted over to eliminate that hairy look described earlier.  Because the artist's handwritten marks were fading, I used a black fine-tipped Sharpie to trace over the marks.
Karen later suggested using fabric stiffening spray, which would have probably solved the entire dilemma, but I had already begun painting the involved areas.  She also wondered (before returning the doll to me) if an entirely new body would decrease the doll's value.  A new body was not an option at that time because my goal was to preserve as much of her originality as possible. 

In some areas (the soles of her feet, ankles, and upper leg joints) I used white felt to cover the exposed stuffing.  Using acrylic paint, the white felt was painted brown to match the color of the original felt as captured in the next photos.

The felt that attached Keziah's upper legs to the joint was worn thin as illustrated here.
The upper leg areas of both legs in front and back were patched with white felt that was glued over the weakened areas.
The felt-patched areas were painted with brown acrylic paint.
I used Epoxy glue to seal a separation between the back of her left arm and the wooden joint.
I managed to piece this dear doll together and purchased a pair of tall faux suede boots to add additional covering and stability to her legs.

I wanted 1860s period-appropriate boots for Keziah but could not find a pair of doll boots to fit her teddy-bear-like feet.  These child-size boots worn unfolded will do for now.

I have since purchased the suggested fabric stiffener, but because the leggings and arm cuffs fit snugly, I will only be able to spray her body and her face, which is at this time not affected by the deterioration.  I will delay doing that for now.  In the meantime, Keziah has been redressed (as illustrated in the last photos), placed on a straddle doll stand and will be handled very gingerly from now on.

The redressing began by putting her pantaloons on.

Next, the boots were slipped on.

Her burgundy plaid dress was put on next.  Wearing the dress without the apron makes Keziah look like a modern girl.

Keziah's hang tag was returned to her right wrist.

Finally, the apron with drawstring at the neck was added before placing Keziah on a straddle doll stand.
While she has not endured as much misery and torment as Job, like Job, it is my hope that the last part of Keziah's [doll] life is more blessed than the first and that she will survive at least another 31 years.


dbg
Thank you for following this blog, for reading the posts, and for your comments. If you are not already a subscriber, go to the homepage. If the right sidebar is not visible, scroll to the bottom and click "desktop view," locate and click "subscribe to posts." Optionally, also subscribe to comments. There is also an email subscription box for those who would like to receive posts by email.

Follow my sister blog Ebony-Essence of Dolls in Black
View the Doll Events page for updates. Check out my eBay listings here.